|
APP: The Survey Panel is an Involves Stage feature that combines all the information of individual tasks and those scheduled by the system. In it you check the status of each sheduling and information reported by the App. PREREQUISITES: Configuration of forms, Tasks, Survey answers. |
Involves Stage allows you to track all the information of individual tasks and those scheduled by the system. With the Survey Panel feature, you can check the status of each scheduling and information reported by the field team through the App.
With it, it is possible to have control of the answer flow of the tasks with details and a series of commands and actions on them. Individual tasks are also created on this feature. This feature does not issue a consolidated report. To do this, see how to extract Survey Answers and OLAP reports.
The feature is accessed on the Web using the path:
Menu > Surveys > Survey Panel
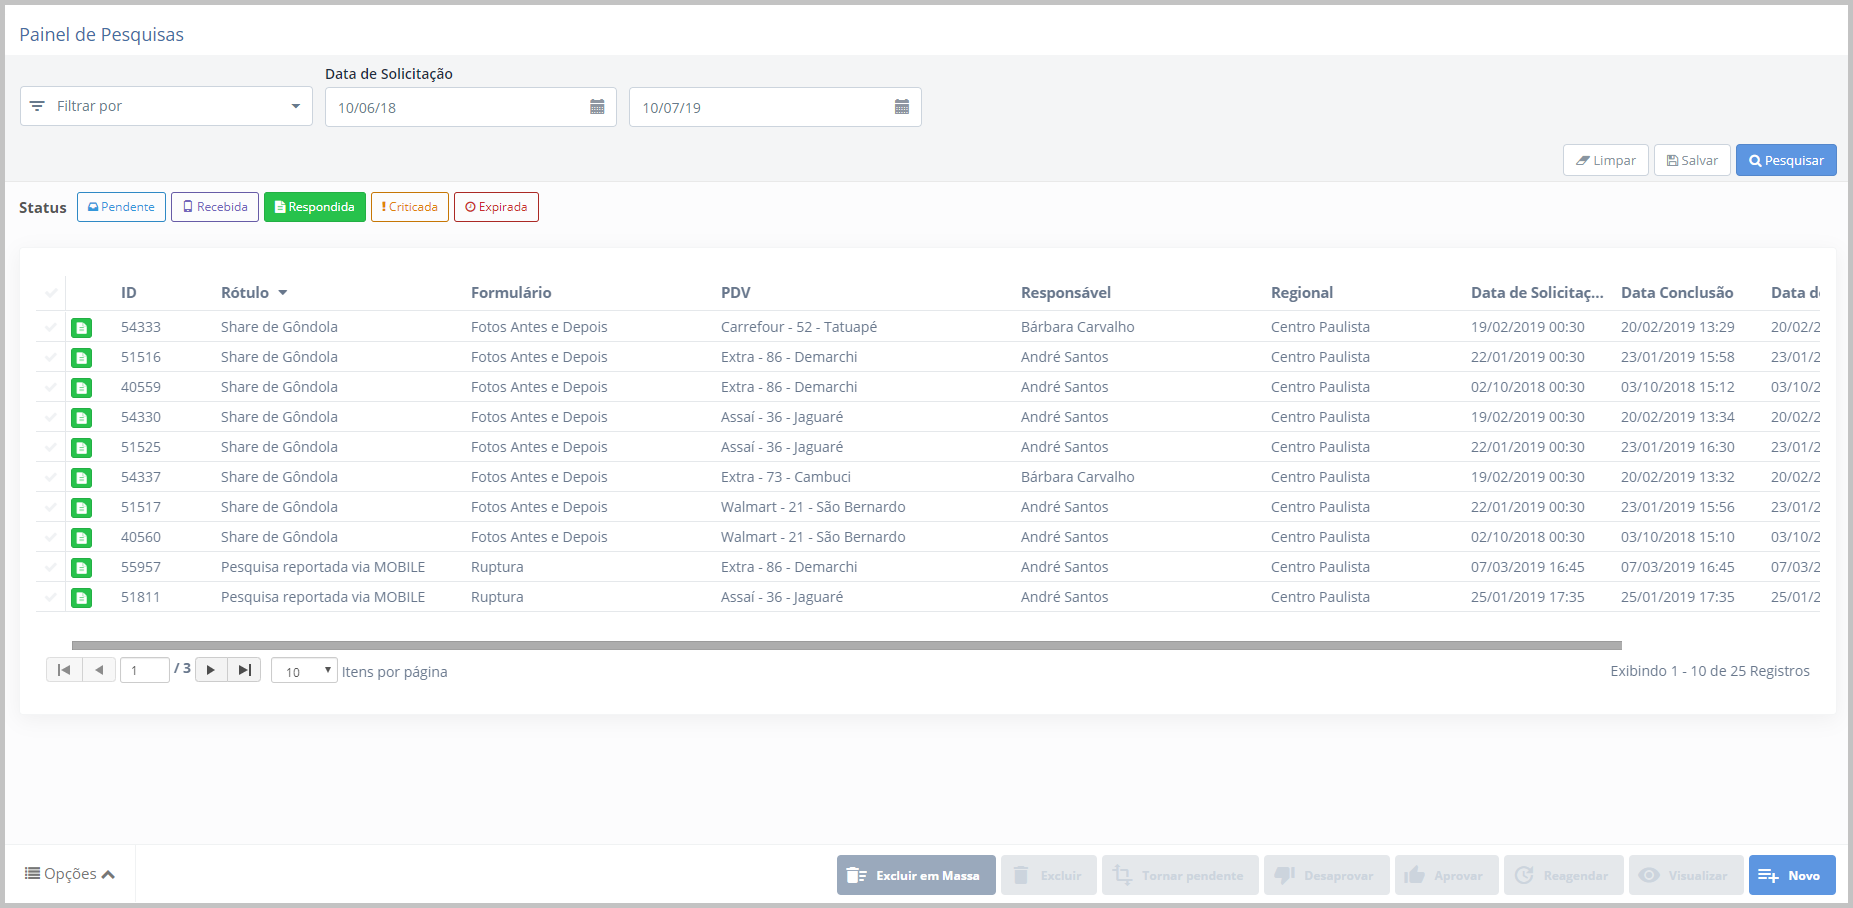
The page features filters at the top to optimize the search for specific information. To understand how they work, click here. The following fields are highlighted:
- Form, to search for specific survey;
- Rescheduled, to filter those that have already been rescheduled;
- Do you have a photo?, for surveys that have images;
- Approval, to filter approved, disapproved and pending surveys;
- Justified?, for surveys that have justification;
- Scheduling, to distinguish from individual tasks and reports.
In addition, you can filter your surveys by the statuses below, marked in different colors:
|
Status |
Color |
Description |
||
|
Pending |
Blue |
Indicates that the task schedule was generated and created in the system, but has not yet been received on the employee's app. |
||
|
Received |
Purple |
Indicates that the employee's app has already synchronized the task. The receipt is made automatically as soon as there is an internet connection on the cell phone or tablet. The task will have this status until it is answered or expires. |
||
|
Answered |
Green |
Indicates that the task has already been answered and the survey data has already been synchronized with the system. If the employee has already completed the survey, but the status of the survey is still in purple, it means that the data has not yet been synchronized. |
||
|
Expired |
Red |
Indicates that the survey was not answered by the deadline. |
||
|
Reviewed |
Orange |
Indicates that an answer on the survey went through the information validation process in a database. This status is a customization of the system and can be contracted by your Success Consultant. |
|
Note The generated surveys are only assigned to the employee if they have enough time to visit and answer the survey before it expires. Therefore, it is common for the Survey Panel to display surveys without assigning an employee to be in charge of it. In a weekly schedule, for example, surveys will be assigned the moment the scheduling starts, assigning the created survey to the employee who has this POS in their itinerary and will visit it before the survey expires. |
Below are examples of how to filter specific information:
| Information | How to filter | |
|
Who reported actions of the competitors in the last week? |
Use the Start Date, End Date and Form filters, searching for the Competitor Actions form. |
|
|
Why didn't an employee receive the task at a specific point of sale? |
Filter by the name of the POS and date of the request. You will see all the tasks created for the point of sale during the period. A common situation is that when scheduling the task, it may have been sent to another employee who also visits the POS. |
|
|
Who has received tasks? |
Click the purple button and filter the results of incoming tasks. |
|
|
Who hasn't received tasks yet? |
Click the blue button and filter the results of pending tasks. |
|
|
Who has already answered tasks? |
Click on the green button and filter the answered surveys. |
|
|
What tasks were justified at a point of sale? |
Filter by the name of the POS and choose the option yes in the Justified? field. You can also filter by the employee's name. The list will show the total number of tasks that have been justified. Remember that tasks justified before the deadline for a reply will have the Received status, as they have not yet expired. |
When selecting one of the listed surveys, the feature allows six actions, available in the buttons at the bottom of the page:
- Delete, to remove the survey from the system´s history;
- Set as pending, to change the status of surveys that have already been approved or disapproved;
- Reject, to change the approval status to rejected;
- Approve, to change the approval status to approved;
- Reschedule, to schedule the survey for another date;
- View, to see detailed survey information.

|
Note Approval status - pending, approved or rejected - does not impact the survey reports or generate notifications in the system, they only assist in controlling the operations. |
VIEW SURVEY
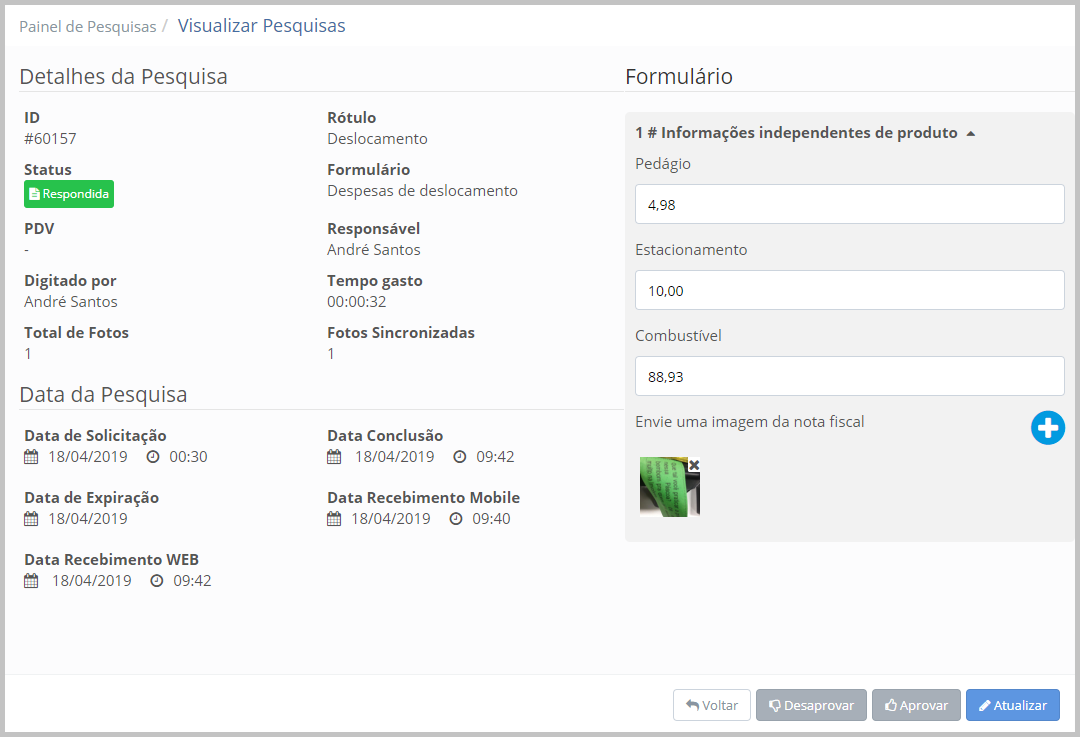
When selecting a survey, you can get detailed information about it, just click on the View button. On the details page of the survey you will find a copy of the form answered by the employee and data on:
- Survey status.
- Point of sale.
- Survey itinerary.
- Form.
- Person in charge.
- Total photos.
- Photos synchronized in the system.
- Time spent, with the total number of minutes spent on the survey.
- Request date, with the task creation date. If the survey is a report, the request date indicates the time of completion.
- Expiration date, which indicates the deadline to answer the survey. The expiration time occurs at 23:59 on the same date. The reported information does not have an expiration date.
- Completion date, indicating the time when the task was actually answered in the app.
- Date of receipt on the Web, indicating the time when the answer was synchronized with the system.
- Mobile receipt date, indicates the time when the task schedule was synchronized with the app.

RESCHEDULE SURVEY
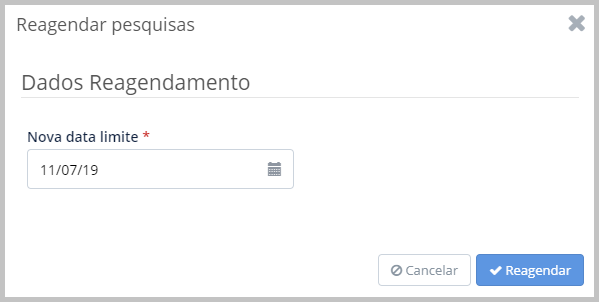
Pending, received or expired surveys can be rescheduled for the employee to answer at a later date. To do this, select the survey and click the Reschedule button. In the Reschedule surveys pop-up, you enter a new deadline for the survey to be answered.

CREATE SURVEY
The New button is used to create a separate task in the employee's itinerary. Individual tasks, as the name implies, are those that do not repeat themselves or are renewed within a short period. They can be used to survey specific information, such as registering or updating points of sale or competitor actions in stores that are not yet part of the field team's itinerary.
Find out how to create one in the Individual tasksarticle.
IMPORTING AND EXPORTING RECORDS
The Survey Panel feature also allows you to import and export survey records. Access is done in the Options feature, in the lower left corner of the screen. There are two export options:
- Export records: download a report in XLSX format with the survey information, with employee data, point of sale, request date, completion date, approval status, etc.
- Export with photos: download a report in PDF format with the photos attached to the survey.
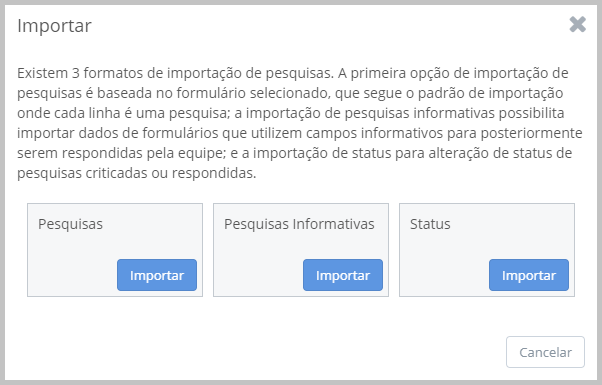
There are three options for importing records:
- Surveys
- Informative surveys
- Status

IMPORT SURVEY
To import survey and answer records that do not occur on Involves Stage, you must use an import template in XLSX format, manually entering the notifier´s information, point of sale, collection time, approval, product line and other fields of a form already registered in the system. To import, go to the Survey Panel page:
- In Options, click on Import;
- In the Import pop-up, select the button of the same name in the Surveys;
- Choose the form in which you will insert the survey answers;
- Wait for the template to download in XLSX format;
- Edit the template information using a spreadsheet editor;
- When saving the file, choose the CSV format (separated by a comma);
- Returning to Involves Stage, click on the Choose file button and upload the template;
- Click the Send button.
IMPORT INFORMATIVE SURVEY
As with a common survey, importing an informational survey will use an import template in XLSX format, manually entering the survey information and fields from a form that uses informative surveys. To import, go to the Survey Panel page:
- In Options, click on Import;
- In the Import pop-up, select the button of the same name in the Informative Surveys option;
- Choose the form in which you will insert the survey answers;
- Wait for the template to download in XLSX format;
- Edit the template information using a spreadsheet editor;
- When saving the file, choose the CSV format (separated by a comma);
- Returning to Involves Stage, click on the Choose file button and upload the template;
- Click the Send button.
|
Important The options for importing surveys will only be available if the chosen form has enabled in your registration the Visible options in the Report menu and Allow editing and approval of the answers after sending options. |
IMPORT STATUS
You can also change the status of surveys registered in the system in bulk. To do this, go to the Survey Panel page:
- In Options, click on Import;
- In the Import pop-up, select the button of the same name in the Surveys option;
- Click on Download template and wait for the file to be downloaded in XLSX format;
- Edit the template information using a spreadsheet editor;
- When saving the file, choose the CSV format (separated by a comma);
- Returning to Involves Stage, click on the Choose file button and upload the template;
- Click the Send button.
|
Important During import, the system may encounter problems filling out the template. In this case, Involves Stage will generate an error report. Learn more in the Import Error Report. article. |


Comments
0 comments
Please sign in to leave a comment.