|
APP: The itineraries in Involves Stage allow you to have a clear and objective view of the field team's route planning, allowing activities and tasks to be scheduled. Both periodic and scheduled itineraries can be registered in the system. Scheduled itineraries can be used when visits do not fit into the periodic itineraries. PREREQUISITES: Employee registration, Concepts and types of itineraries. |
Scheduled itineraries are for when visits do not fit into the periodic itineraries. There is no limit to how many points of sales can be included in scheduled itineraries, however the system does not allow the same POS to be listed for a visit in both itineraries.
For example, if employee James has a weekly periodic schedule that he already executes but needs to make an individual visit to a point of sale, he will create a scheduled itinerary for this individual visit.
Manual itinerary registration is done in the Itinerary and Visits feature, on the path:
Menu > Itineraries and Visits > Itineraries
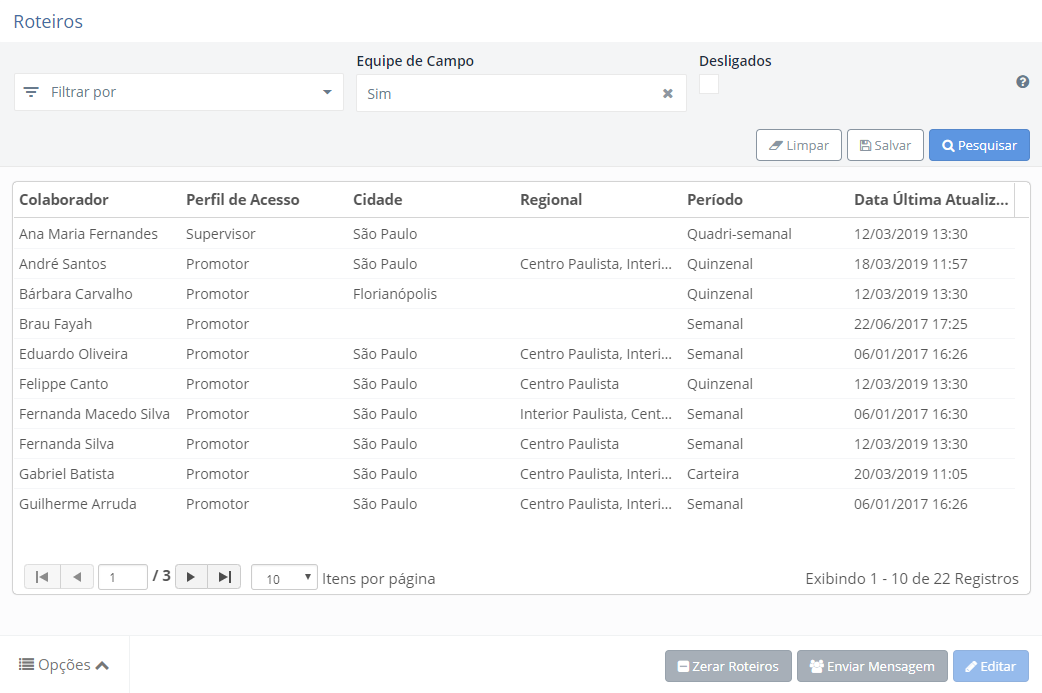
To register or edit a new itinerary, click on the name of the employee and after click on the Edit button, on the lower right-hand side of the screen. You will be taken to the Itinerary page, to specifically edit this employee, following these steps:
- Select the Scheduled Itineraries.
- Choose if you wish to register an itinerary in a Calendar or Visit on any date.
- Select the points of sale that will become a part of this itinerary.
CHOOSE THE TYPE OF ITINERARY
At the top of the screen you will find the name and picture of the employee, followed by the itinerary type, whether periodic or scheduled. In this case, select the Scheduled Iitineraries. Remember that the system does not allow the same POS to be listed for scheduled and periodic visits.

When using the calendar, you have three registration possibilities:
- Route planning using a map
- Edit itinerary or Add Itinerary
- Schedule visits that will be repeated

When choosing Route planning using a map you will be taken to the Map page, where you can navigate using Google Maps. Remember that for this action, the points of sale must be georeferenced in your records, otherwise they will not appear on the map for selection.
- Learn how to plan routes using a map
ADD ITINERARY WITH A FIXED DATE
If you want an itinerary to be available for the employee on specific days, choose the day in the Select date field and click on the Add itinerary button.

In the Add itinerary pop-up, you will see two tabs. In Select POS you find all the available stores you can add and, additionally, you can perform searches using several filters. Next to the name of the POS, click on the ![]() icon to add to the itinerary and on the
icon to add to the itinerary and on the ![]() icon to remove.
icon to remove.
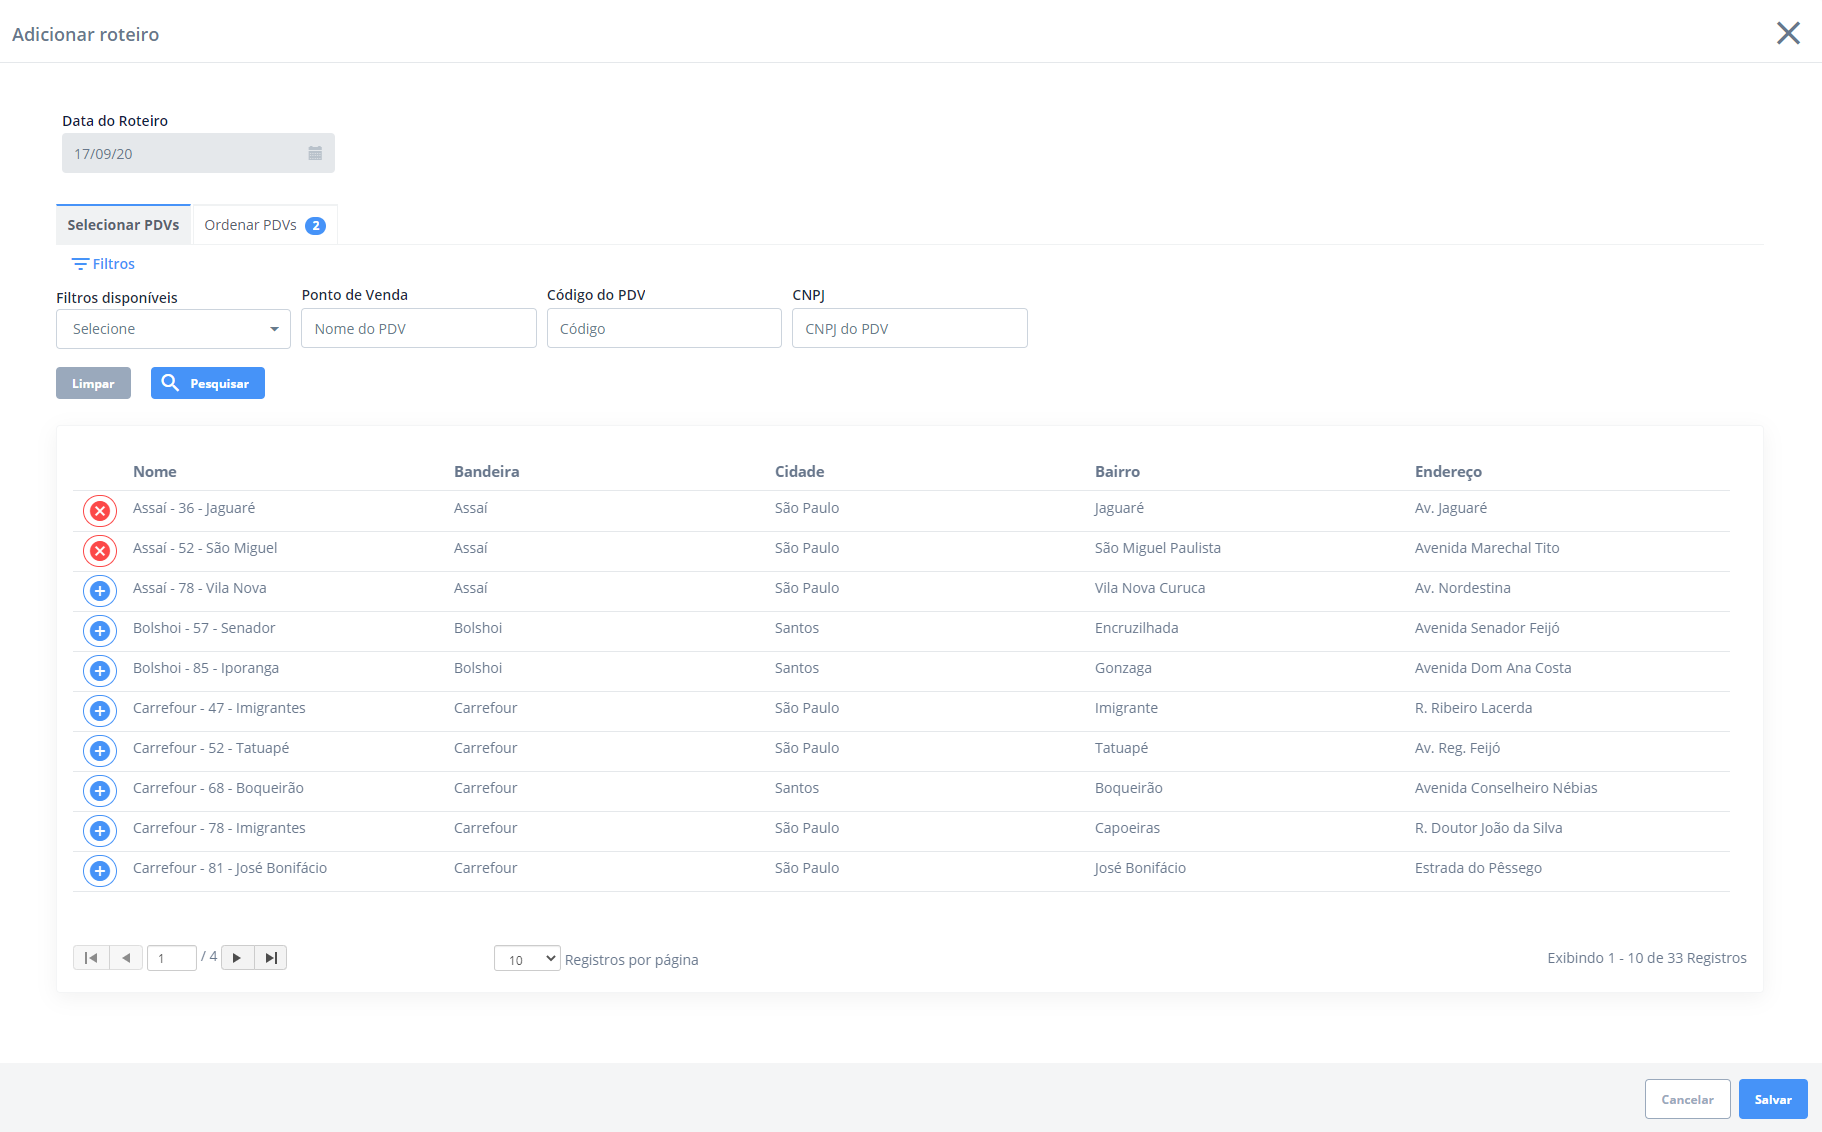
In the Sort POS tab, you can change the order of the list by simply clicking the mouse cursor over the name of the point of sales and dragging it to another position.
You can also include the entry and exit time - to be able to generate time reports and alerts for delays as well as add a description about the point of sale - this space can be used to insert more information or details about the POS, as it will be visualized by the employee in the app. After verifying the information, simply click on Save.
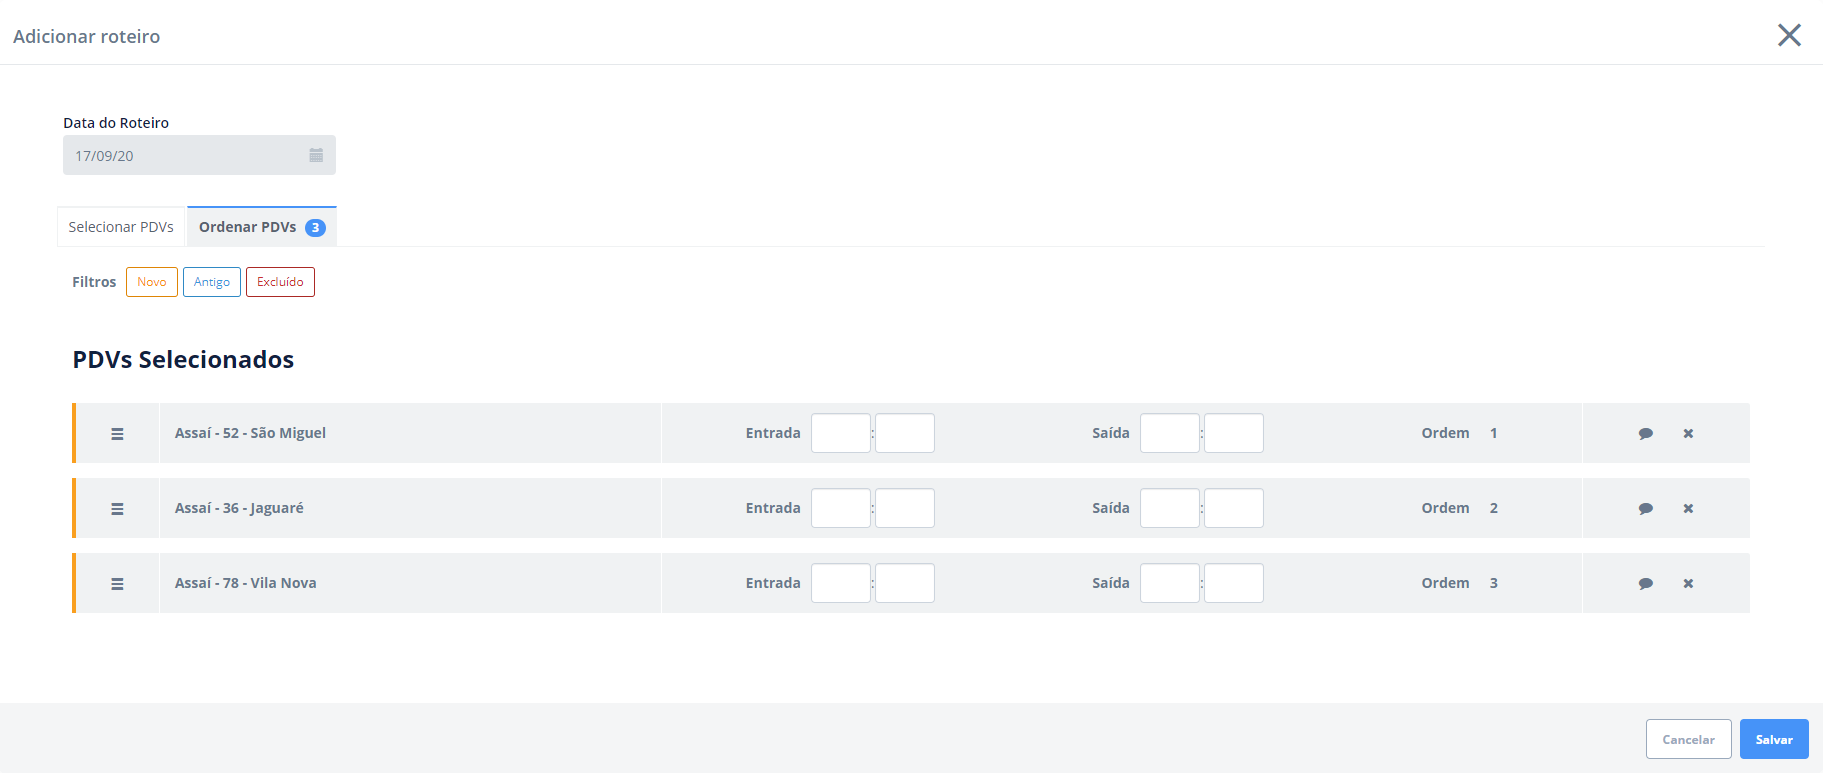
SCHEDULE VISITS THAT WILL BE REPEATED
When scheduling visits, you can plan those that repeat every month. With it you have a clearer view of the visitation schedule of each person on the team, facilitating planning and placing greater focus on its execution.
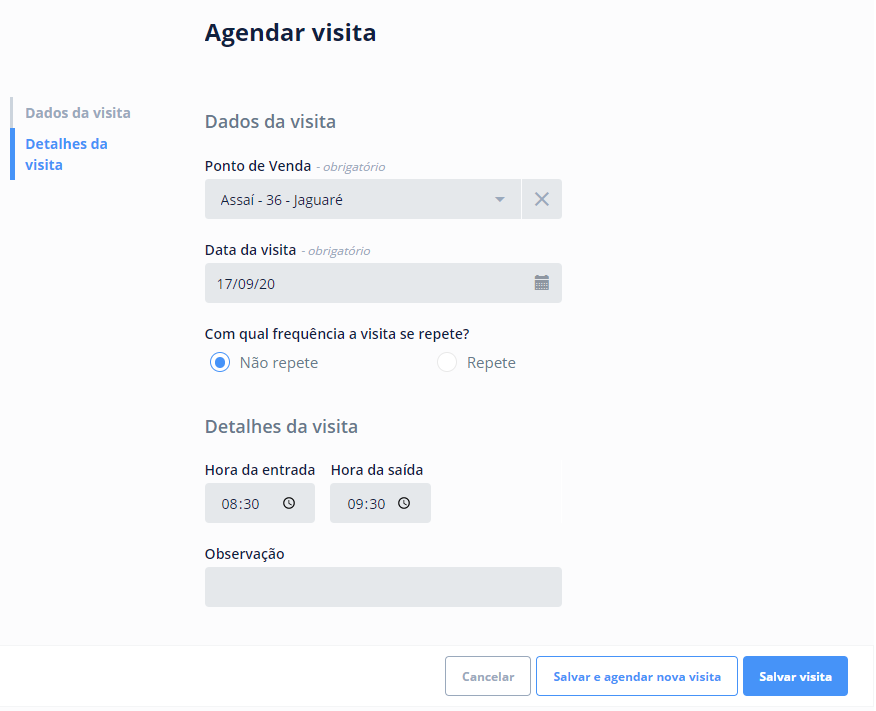
To do this, click on the Schedule visit icon. On the new page, you must fill out the following fields:
- Point of sale, searching for the store by name;
- Visit date, selecting the day;
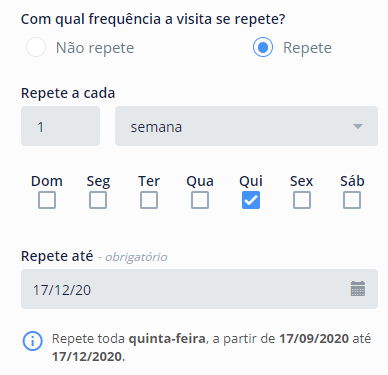
- How often will this visit be repeated?
If you choose to repeat the visit, choose the number of repetitions and whether it will be every week or every month. Even choose the day of the repetition and when it will be concluded:
You can even fill out more details, such as the entry and exit times at the POS and important notes about it for the field team. After this, simply choose between:
- Save and schedule new visit, to choose another date
- Save visit, to finish the registration
Comments
Please sign in to leave a comment.